
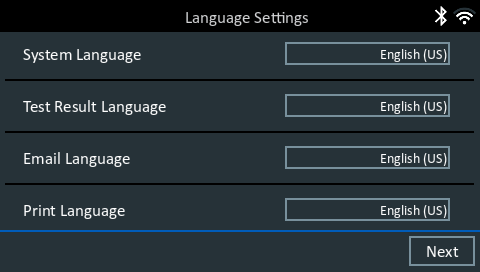
1. Upon initial power-up, the Language Settings screen is displayed on the screen. Tap Next to continue.
2. A Consent to Collect Data screen is displayed. Tap the Consent check box and then tap Next to continue.
3. Using the displayed keypad template, enter the new user name and password.
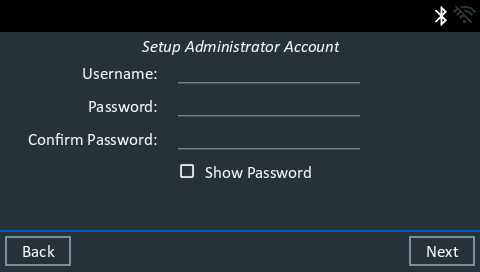
4. Tap Next to continue.

5. The Date/Time Settings are displayed. Tap Next to continue after making any adjustments.

6. The Test Settings are displayed. Tap Next to continue after making any adjustments.
7. A list of devices connected to the tester is displayed.
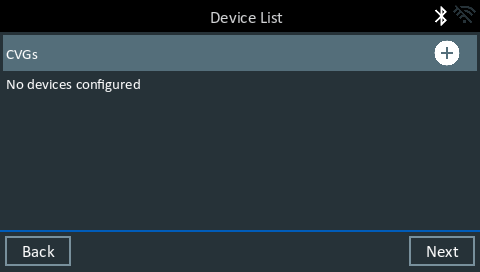
To add a device, tap the plus (+) sign and follow the on-screen instructions. To unlink from a device, tap the displayed serial number to select it. Tap the trash can icon
to delete it.
NOTE: A passkey number is automatically generated once the Bluetooth pairing has been established.
8. A listing of detected Configured WiFi networks is displayed.
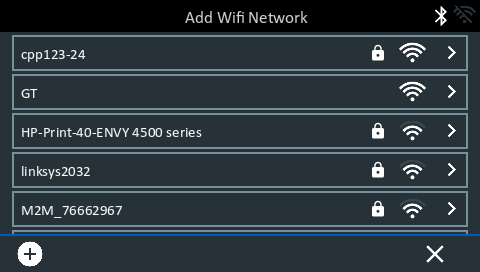
To select a network: For initial setup, no networks will be displayed here yet.
To add a network: Tap the plus (+) sign, then select from one of the displayed detected networks.
To manually add a network, tap the plus (+) sign again. Follow the on-screen instructions to select the Network SSID, Security, and IP Settings. Tap Next when finished.
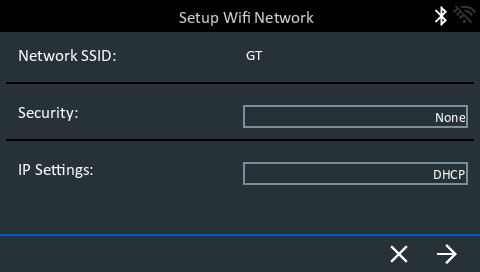
Use the onscreen keypad to manually enter the Network SSID, security type, and IP settings. If necessary, enter the WiFi network password. Tap Next when finished.
A confirmation screen is displayed when the analyzer has successfully connected to the WiFi network.
To delete a network: Tap a displayed network to select it. Tap trash can icon ![]()
to delete it.
9. The BMIS (Battery Management Information System) Account screen is displayed.
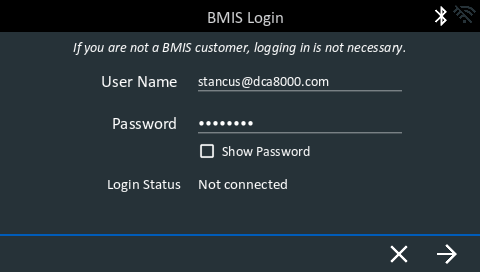
Tap Yes to connect the analyzer to an existing BMIS account. Enter a BMIS User Name and Password for the analyzer to use when transmitting test data to the BMIS database.
NOTE: BMIS is a subscription-based service. Contact Midtronics for additional information.
10. The Email Address Book screen (Admin Only) is displayed.
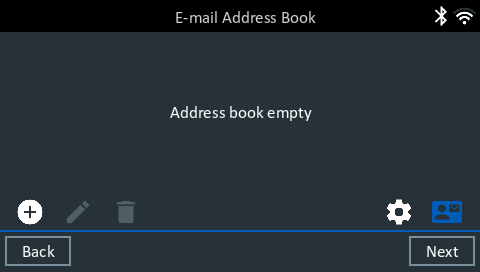
To add an email address: Tap the plus (+) sign, then use the displayed keyboard to add the address.
To edit an email address: Tap pencil icon![]()
then use the displayed keyboard to edit the address.
To delete an email address: Tap a displayed email address to select it. Tap trash can icon ![]()
to delete it.
To use the Default Email Server Settings: Tap the gear icon 
to use the default.
11. The Shop Information screen (Admin Only) is displayed
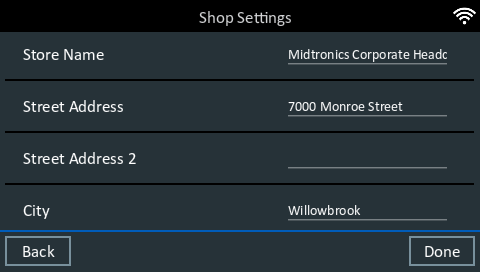
Use the onscreen keypad to enter the store name, address, and phone number. Tap Next to continue.
12. The login screen is displayed:
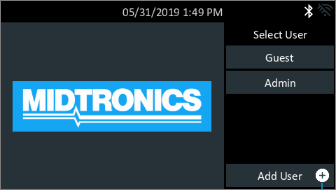
13. Tap a user name to access the Main Menu.